Esta es una página de archivo y se conserva como referencia. El contenido histórico está disponible solo en inglés.
Overview
This archive collects the software updates, drivers, utilities, plug-ins and documentation that IVS published for the Leitch / Harris Velocity non-linear editing family: VelocityHD (Altitude hardware), VelocityQ (Quattrus hardware), Velocity (Reality hardware) and the older Perception/PVR boards, together with two export tutorials for Velocity.
VelocityHD
VelocityQ
For the Quattrus drivers see Drivers below.
Velocity (Reality hardware)
| Item | Date | Notes |
|---|
| Velocity 8.2.39 | | Update from 8.2.16 |
| ivsPowerPack 1.1.6 | 10 October 2008 | IVS add-on pack for Velocity |
| After Effects CS4 ivsIO | 7 December 2009 | Advanced I/O plug-in for After Effects CS4 |
| Fusion ivsIO | 7 December 2009 | Advanced I/O plug-in for Fusion 5.x and 6.0, 32 and 64-bit |
| Velocity 8.2 User Guide (PDF) | | Documentation (no file in the archive) |
| Velocity 7.5 User Guide (PDF) | | Documentation |
Perception / PVR
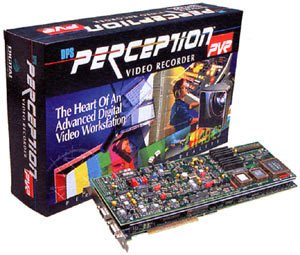
Drivers: Reality, Quattrus, Altitude
Utilities
| Utility | Date | Notes |
|---|
| SoftDV 121 | 8 November 2004 | Adds support for Windows XP SP2 or later |
| DpsDiskTool 2.5.3 | 8 November 2004 | Detects and fixes damaged or corrupted DPS files, and can recover accidentally deleted files |
Tutorials
Exporting a sharp MPEG-2 TS file for Blu-ray authoring
How to create a Velocity export preset for MPEG-2 transport streams suitable for Blu-ray disc authoring. (Some ready-to-use presets were added with the ivsPowerPack setup installer build 1.1.2.)
- From the Output menu select Movie Output > MPG, then click Modify Settings in the Movie Output dialog.
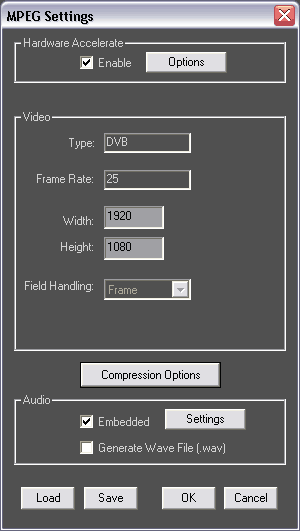
- Configure the MPEG Settings dialog as follows:
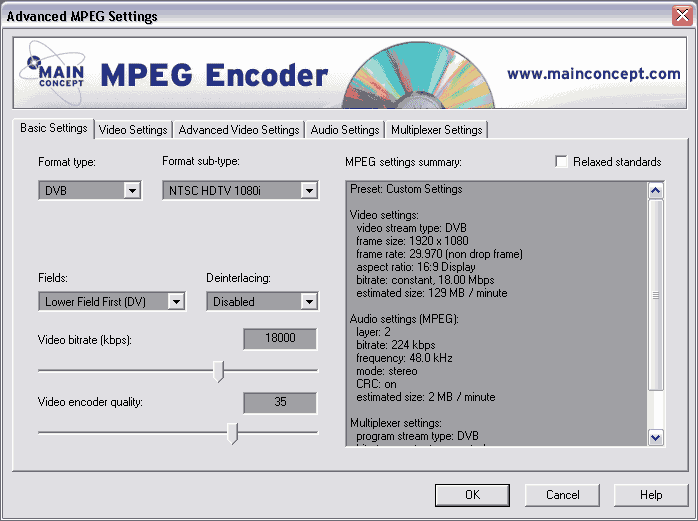
- Click Compression Options and set the Basic Settings tab of the Advanced MPEG Settings dialog, for NTSC HDTV:
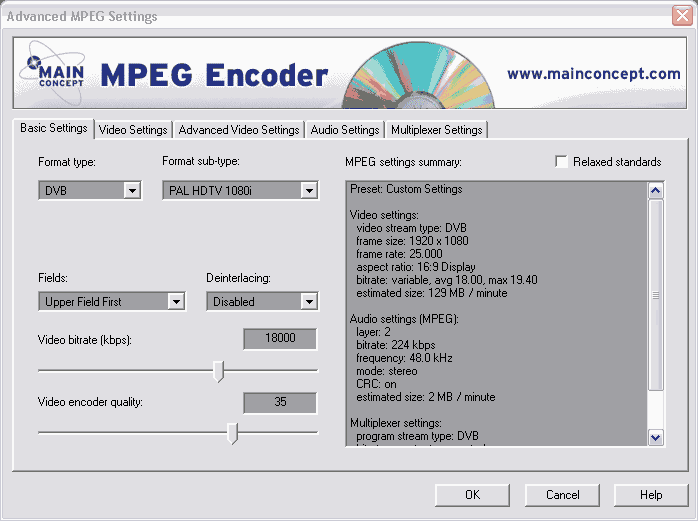
or for PAL HDTV:
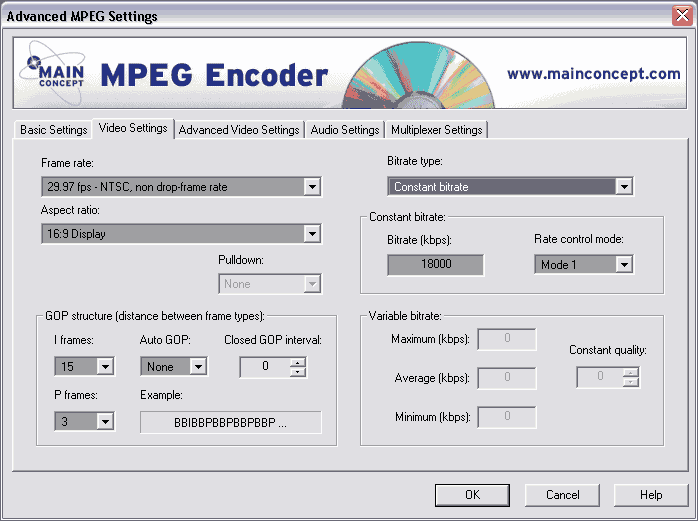
- Set the Video Settings tab, for NTSC HDTV:
or for PAL HDTV:
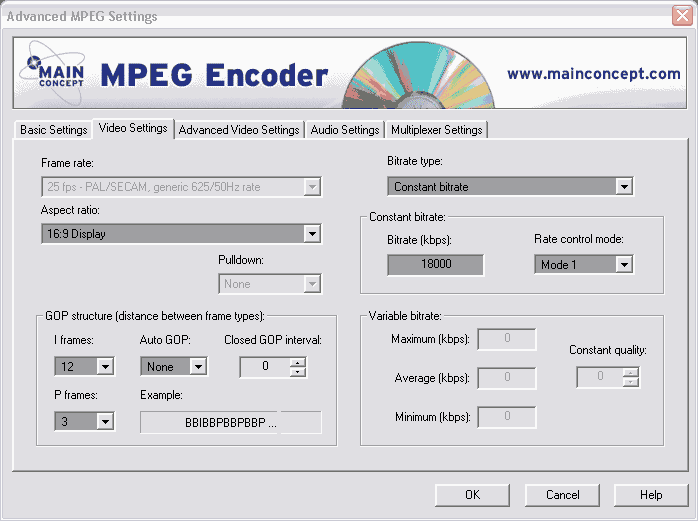
- Configure the remaining tabs as follows, for both NTSC and PAL HDTV:
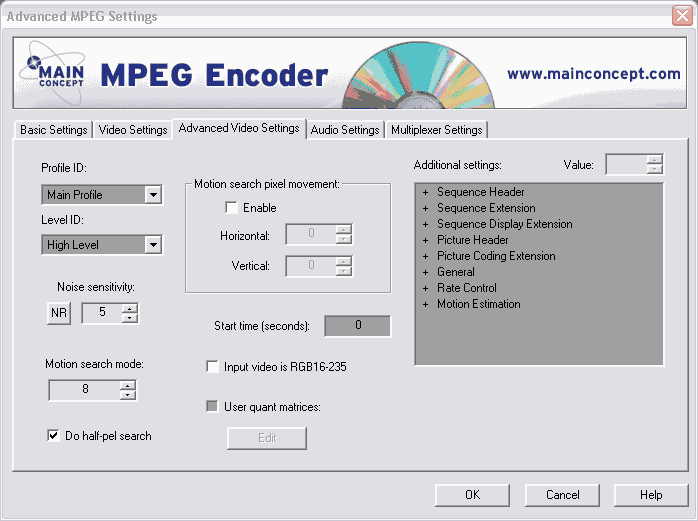
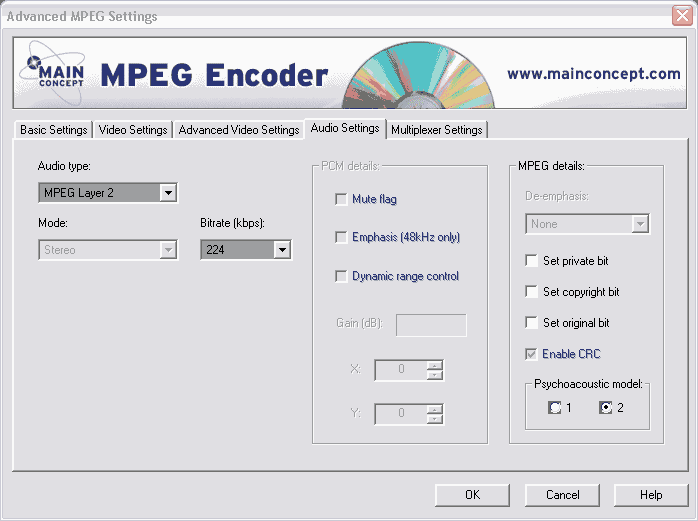
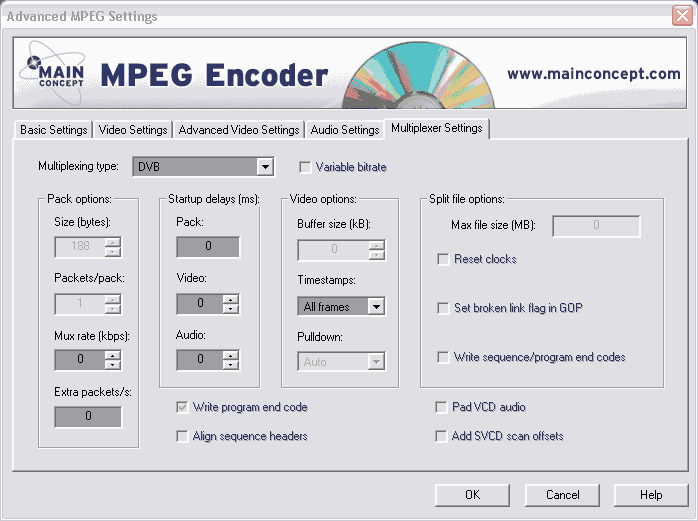
- Click OK to close the Advanced MPEG Settings dialog, then Save to store the new preset for Blu-ray authoring.
Getting the most from Windows Media codecs with Velocity
- Update the Windows Media codecs to the more advanced version available from Microsoft or from the archived installer. The installer works in the background: wait for the message "Windows Media Format 11 Runtime Setup has completed", then reboot.
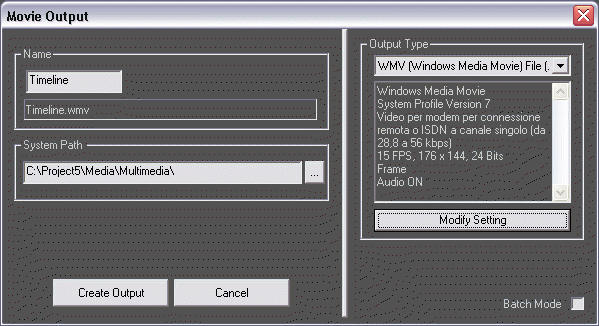
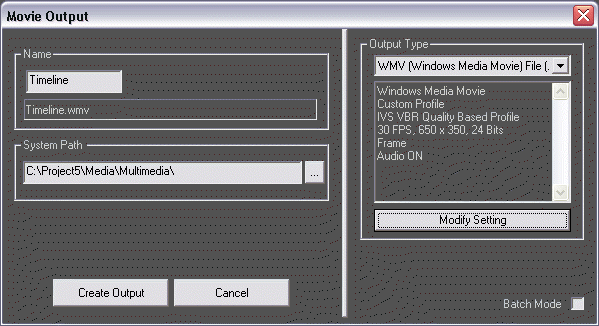
- In Velocity, from Output > Movie Output select WMV and click Modify Settings.
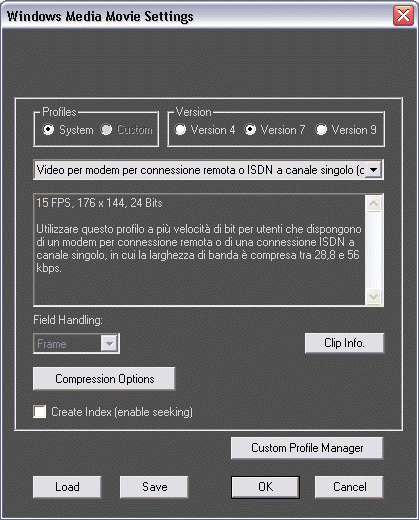
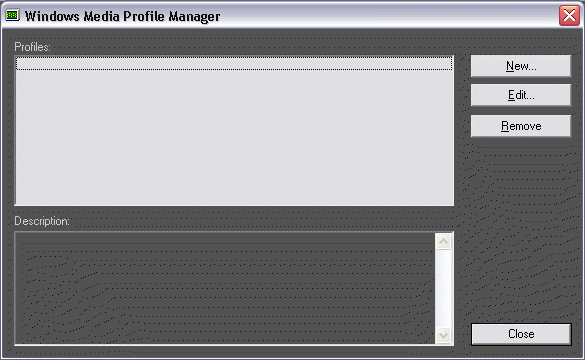
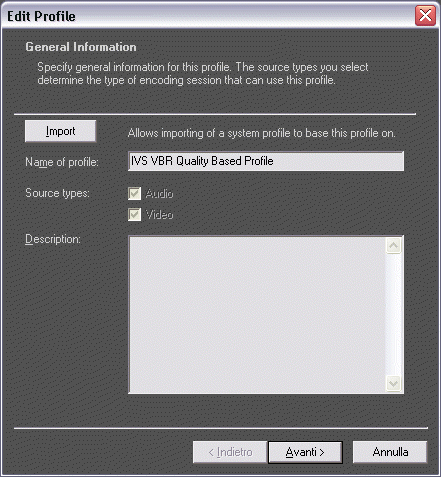
- Click Custom Profile Manager, then New.
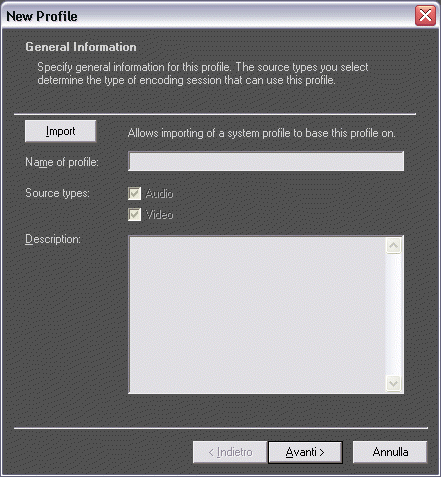
- Type a name for the new profile and click Next.
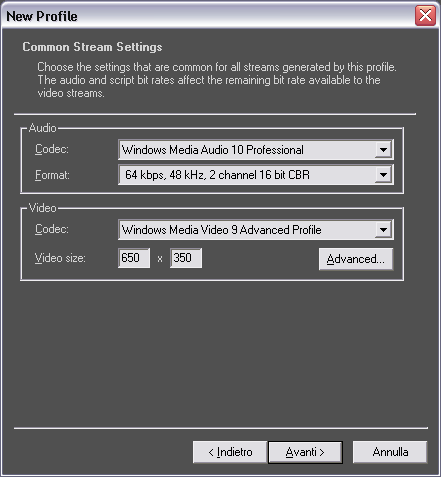
- Select the audio codec, bit rate and sampling mode; select the video codec Windows Media 9 Advanced Profile; set the target resolution; click Next.
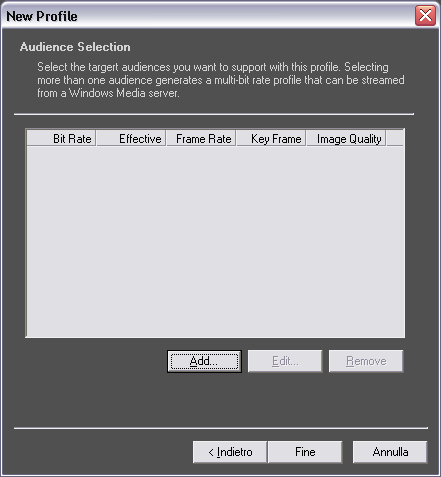
- Click Add... and enter a video bit rate (only a reference value: the actual bit rate will be determined by quality, see next step); click Next.
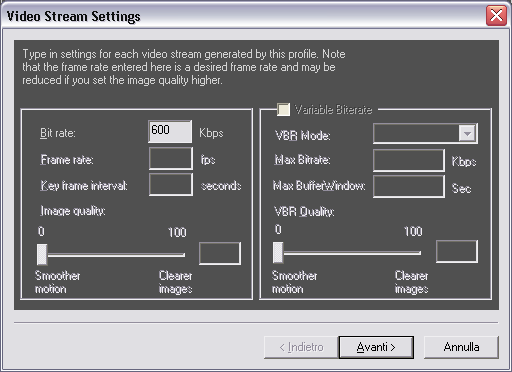
- Set the target frame rate, enable Variable Bitrate, set VBR Mode to Quality and the Image Quality slider to 80. This slider is the key to the result: depending on the source, try values between 75 and 88. Click Finish.
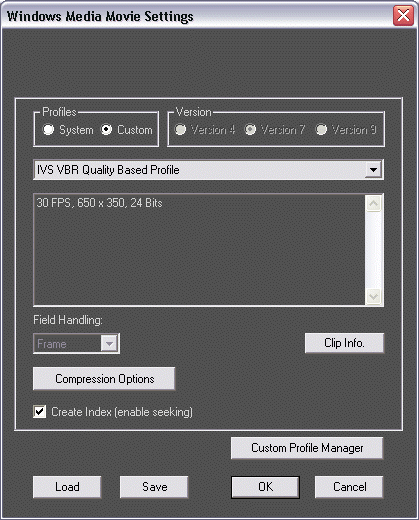
- The new profile is listed; click Edit to change it or Finish, then Close to return to the Velocity Windows Media Movie Settings dialog.
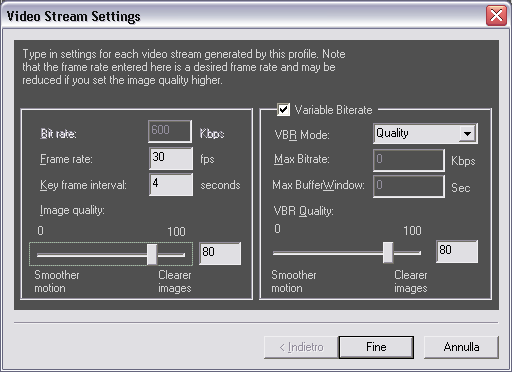
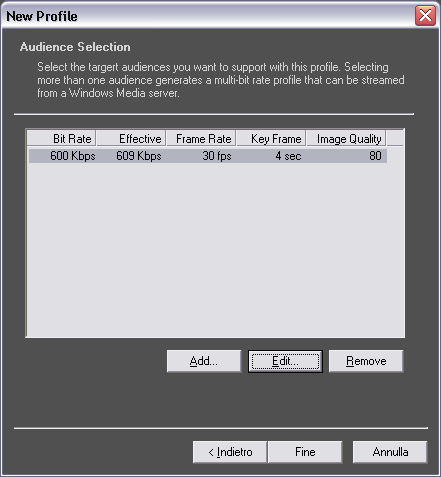
- Enable Custom Profiles, select the new profile and enable Create Index.
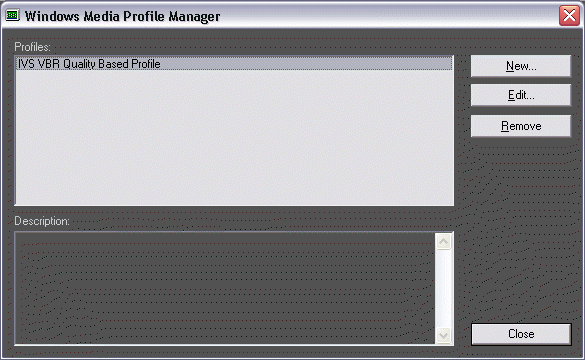
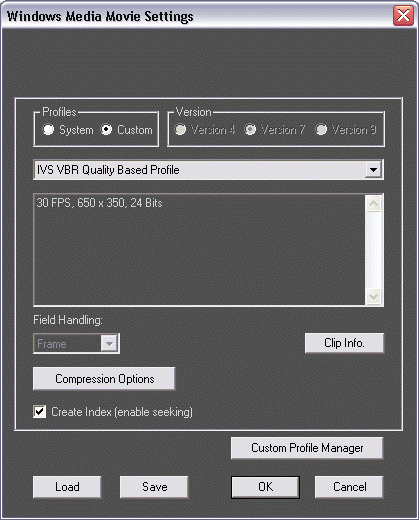
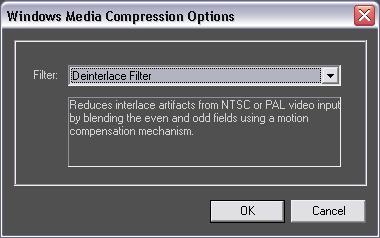
- Under Compression Options you can enable image filters such as the Deinterlace filter (Velocity 9 only). For a target vertical resolution below the single-field resolution (240 for NTSC, 288 for PAL), set Field Handling to Field 1 or Field 2 and do not use the Deinterlace filter; use it only when the target height is greater than the single-field height and the scene contains a lot of motion. Click OK.
- Click Create Output to generate the Windows Media movie.
Altitude, Quattrus, Reality, Velocity, VelocityHD and VelocityQ are trademarks of Harris Corporation.